https://www.elastic.co/guide/en/logstash/7.6/output-plugins.html1、Stdout 插件
stdout 插件将数据输出到屏幕终端,主要用于调试
output {
    stdout {
        codec => rubydebug
    }
}
2、File 插件
输出到文件,可以将将分散在多个文件的数据统一存放到一个文件
示例: 将所有 web 机器的日志收集到一个文件中,从而方便统一管理
output {
   stdout {
       codec => rubydebug
   }
   file {
       path => "/var/log/test.log"
   }
}
范例:
root@logstash01:~# logstash -e 'input { stdin{} } output { file{ path => "/tmp/logstash.log" }}'
test # 输入
[INFO ] 2023-01-04 07:29:13.292 [[main]>worker1] file - Opening file {:path=>"/tmp/logstash.log"}
[INFO ] 2023-01-04 07:29:31.264 [[main]>worker1] file - Closing file /tmp/logstash.log

root@logstash01:~# cat /tmp/logstash.log
{"@timestamp":"2023-01-04T07:29:13.134Z","host":"logstash01.test.com","message":"test","@version":"1"}
3、Elasticsearch 插件
https://www.elastic.co/guide/en/logstash/7.6/plugins-outputs-elasticsearch.html
https://www.joda.org/joda-time/apidocs/org/joda/time/format/DateTimeFormat.html
当日志量较小时,可以按月或周生成索引,当日志量比较大时,会按天生成索引,以方便后续按天删除
output {
   elasticsearch {
     hosts =>["192.168.1.101:9200","192.168.1.102:9200","192.168.1.103:9200"]#一般写ES中data节点地址
     index => "app-%{+YYYY.MM.dd}" #指定索引名称,建议加时间,按天建立索引
     #index => "%{[@metadata][target_index]}"#使用字段[@metadata][target_index]值做为索引名
     template_overwrite => true      #覆盖索引模板,此项可选,默认值为false
   }
}
注意:索引名必须为小写
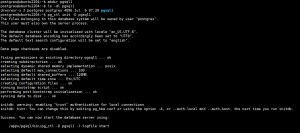
范例:将标准输入输出到 elasticsearch
root@logstash01:~# logstash -e 'input { stdin{} } output { elasticsearch {hosts => ["192.168.1.101:9200"] index => "mytest-%{+YYYY.MM.dd}" }}'
# 输入
Elasticsearch test
![图片[1]-Logstash 输出 Output 插件-李佳程的个人主页](http://www.lijiach.com/wp-content/uploads/2023/01/image-78.png)
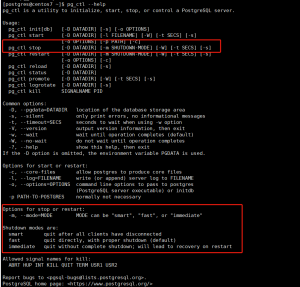
范例:将文件输出至 Elasticsearch
root@logstash01:~# logstash -e 'input { file { path => "/var/log/bootstrap.log" start_position => "beginning" stat_interval => "3" } } output { elasticsearch {hosts => ["192.168.1.101:9200"] index => "logfile-%{+YYYY.MM.dd}" }}'
![图片[2]-Logstash 输出 Output 插件-李佳程的个人主页](http://www.lijiach.com/wp-content/uploads/2023/01/image-79.png)
范例:配置文件实现
# 将配置写入配置文件中
root@logstash01:~# vim /etc/logstash/conf.d/logstash-test.conf
input {
   file {
       path => "/var/log/syslog"
       start_position => "beginning"
       stat_interval => 3
   }
}
output {
   elasticsearch {
       hosts => ["192.168.1.101:9200"]
       index => "syslog-%{+YYYY.MM.dd}"
   }
}

root@logstash01:~# logstash -f /etc/logstash/conf.d/logstash-test.conf -t

root@logstash01:~# logstash -f /etc/logstash/conf.d/logstash-test.conf
![图片[3]-Logstash 输出 Output 插件-李佳程的个人主页](http://www.lijiach.com/wp-content/uploads/2023/01/image-80.png)
4、Redis 插件
Logstash 支持将日志转发至 Redis
input {
    file {
        path => "/var/log/nginx/access.log"
        type => 'nginx-accesslog'
        start_position => "beginning"
        stat_interval => "3"
        codec ==> json
    }
}
output {
    if [type] == 'nginx-accesslog' {
        redis {
            host => 'Redis_IP'
            port => "6379"
            password => "123456"
            db => "0"
            data_type => 'list'
            key => "nginx-accesslog"
        }
    }
}
5、Kafka 插件
Logstash 支持将日志转发至 Kafka
input {
    file {
        path => "/var/log/nginx/access.log"
        type => 'nginx-accesslog'
        start_position => "beginning"
        stat_interval => "3"
        codec ==> json
    }
    file {
        path => "/var/log/nginx/error.log"
        type => 'nginx-errorlog'
        start_position => "beginning"
        stat_interval => "3"
    }
}
output {
    #stdout {}
    if [type] == 'nginx-accesslog' {
        kafka {
            bootstrap_servers => '192.168.1.87:9092,192.168.1.88:9092,192.168.1.89:9092'
            topic_id => 'nginx-accesslog'
            codec => 'json'    #如果是Json格式,需要标识的字段
        }
    }
    if [type] == 'nginx-errorlog' {
        kafka {
            bootstrap_servers => 'Kafka_IP1:9092,Kafka_IP2:9092,Kafka_IP3:9092'
            topic_id => 'nginx-errorlog'
            codec => 'json'  #为了保留logstash添加的字段,比如:type字段,也需要指定json格式,否则会丢失logstash添加的字段
        }
    }
}
© 版权声明
文章版权归作者所有,未经允许请勿转载。
THE END