![图片[1]-部署MHA实现Mysql高可用-李佳程的个人主页](http://www.lijiach.com/wp-content/uploads/2022/11/image-140.png)
1、在管理节点上安装mha4mysql-manager和mha4mysql-node
[root@mha ~]# wget https://github.com/yoshinorim/mha4mysql-manager/releases/download/v0.58/mha4mysql-manager-0.58-0.el7.centos.noarch.rpm
[root@mha ~]# wget https://github.com/yoshinorim/mha4mysql-node/releases/download/v0.58/mha4mysql-node-0.58-0.el7.centos.noarch.rpm--2022-11-21 13:22:21--  https://github.com/yoshinorim/mha4mysql-node/releases/download/v0.58/mha4mysql-node-0.58-0.el7.centos.noarch.rpm

[root@mha ~]# yum install -y perl-DBD-MySQL perl-Config-Tiny perl-Log-Dispatch perl-Parallel-ForkManager perl-YAML-Tiny perl-PAR-Dist perl-Module-ScanDeps perl-Module-CoreList perl-Module-Build perl-CPAN perl-CPANPLUS perl-File-Remove perl-Module-Install

[root@mha ~]# yum install -y mha4mysql-node-0.58-0.el7.centos.noarch.rpm

[root@mha ~]# yum install -y mha4mysql-manager-0.58-0.el7.centos.noarch.rpm
2、在所有MySQL服务器上安装mha4mysql-node包
[root@centos79-mysql01 ~]# yum install -y mha4mysql-node-0.58-0.el7.centos.noarch.rpm
[root@centos79-mysql02 ~]# yum install -y mha4mysql-node-0.58-0.el7.centos.noarch.rpm
[root@centos79-mysql03 ~]# yum install -y mha4mysql-node-0.58-0.el7.centos.noarch.rpm
3、在所有节点实现相互之间ssh key验证
[root@mha ~]# ssh-keygen
[root@mha ~]# ssh-copy-id 127.0.0.1
[root@mha ~]# rsync -av .ssh 192.168.1.21:/root/
[root@mha ~]# rsync -av .ssh 192.168.1.22:/root/
[root@mha ~]# rsync -av .ssh 192.168.1.23:/root/
4、在管理节点建立配置文件
[root@mha ~]# mkdir /etc/mastermha
[root@mha ~]# vim /etc/mastermha/app1.cnf
user=mhauser        #用于远程连接MySQL所有节点的用户,需要有管理员的权限
password=123456
manager_workdir=/data/mastermha/app1/   #目录会自动生成,无需手动创建
manager_log=/data/mastermha/app1/manager.log
remote_workdir=/data/mastermha/app1/
ssh_user=root       #用于实现远程ssh基于KEY的连接,访问二进制日志
repl_user=copyuser  #主从复制的用户信息
repl_password=123456
ping_interval=1     #健康性检查的时间间隔
master_ip_failover_script=/usr/local/bin/master_ip_failover   #切换VIP的perl脚本,不支持跨网络,也可用Keepalived实现

report_script=/usr/local/bin/sendmail.sh  #当执行报警脚本
check_repl_delay=0   #默认值为1,表示如果slave中从库落后主库relay log超过100M,主库不会选择这个从库为新的master,因为这个从库进行恢复需要很长的时间.通过设置参数check_repl_delay=0,mha触发主从切换时会忽略复制的延时,对于设置candidate_master=1的从库非常有用,这样确保这个从库一定能成为最新的master

master_binlog_dir=/data/mysql/  #指定二进制日志存放的目录,mha4mysql-manager-0.58必须指定,之前版本不需要指定

[server1]
hostname=192.168.1.21
port=3306
candidate_master=1
[server2]
hostname=192.168.1.22
port=3306
candidate_master=1        #设置为优先候选master,即使不是集群中事件最新的slave,也会优先当master
[server3]
hostname=192.168.1.23
port=3306
# 最终配置
[server default]
user=mhauser
password=123456
manager_workdir=/data/mastermha/app1/
manager_log=/data/mastermha/app1/manager.log
remote_workdir=/data/mastermha/app1/
ssh_user=root
repl_user=copyuser
repl_password=123456
ping_interval=1
master_ip_failover_script=/usr/local/bin/master_ip_failover
report_script=/usr/local/bin/sendmail.sh
check_repl_delay=0
master_binlog_dir=/data/mysql/
[server1]
hostname=192.168.1.21
candidate_master=1
[server2]
hostname=192.168.1.22
candidate_master=1
[server3]
hostname=192.168.1.23主库宕机谁来接管新的master
1. 所有从节点日志都是一致的,默认会以配置文件的顺序去选择一个新主
2. 从节点日志不一致,自动选择最接近于主库的从库充当新主
3. 如果对于某节点设定了权重(candidate_master=1),权重节点会优先选择。但是此节点日志量落后主库超过100M日志的话,也不会被选择。可以配合check_repl_delay=0,关闭日志量的检查,强制选择候选节点5、相关脚本
[root@mha ~]# chmod +x /usr/local/bin/*

[root@mha ~]# cat /usr/local/bin/sendmail.sh
#!/bin/bash
echo "MHA is failover!" | mail -s "MHA Warning" 18961236318@189.cn


[root@mha ~]# vim /usr/local/bin/master_ip_failover
#!/usr/bin/env perl

#  Copyright (C) 2011 DeNA Co.,Ltd.
#
#  This program is free software; you can redistribute it and/or modify
#  it under the terms of the GNU General Public License as published by
#  the Free Software Foundation; either version 2 of the License, or
#  (at your option) any later version.
#
#  This program is distributed in the hope that it will be useful,
#  but WITHOUT ANY WARRANTY; without even the implied warranty of
#  MERCHANTABILITY or FITNESS FOR A PARTICULAR PURPOSE.  See the
#  GNU General Public License for more details.
#
#  You should have received a copy of the GNU General Public License
#   along with this program; if not, write to the Free Software
#  Foundation, Inc.,
#  51 Franklin Street, Fifth Floor, Boston, MA  02110-1301  USA

## Note: This is a sample script and is not complete. Modify the script based on your environment.

use strict;
use warnings FATAL => 'all';

use Getopt::Long;
use MHA::DBHelper;

my (
  $command,        $ssh_user,         $orig_master_host,
  $orig_master_ip, $orig_master_port, $new_master_host,
  $new_master_ip,  $new_master_port,  $new_master_user,
  $new_master_password
);
my $vip = '192.168.1.20/24';
my $key = "1";
my $ssh_start_vip = "/sbin/ifconfig eth0:$key $vip";
my $ssh_stop_vip = "/sbin/ifconfig eth0:$key down";

GetOptions(
  'command=s'             => \$command,
  'ssh_user=s'            => \$ssh_user,
  'orig_master_host=s'    => \$orig_master_host,
  'orig_master_ip=s'      => \$orig_master_ip,
  'orig_master_port=i'    => \$orig_master_port,
  'new_master_host=s'     => \$new_master_host,
  'new_master_ip=s'       => \$new_master_ip,
  'new_master_port=i'     => \$new_master_port,
  'new_master_user=s'     => \$new_master_user,
  'new_master_password=s' => \$new_master_password,
);

exit &main();

sub main {
  if ( $command eq "stop" || $command eq "stopssh" ) {

    # $orig_master_host, $orig_master_ip, $orig_master_port are passed.
    # If you manage master ip address at global catalog database,
    # invalidate orig_master_ip here.
    my $exit_code = 1;
    eval {

      # updating global catalog, etc
      $exit_code = 0;
    };
    if ($@) {
      warn "Got Error: $@\n";
      exit $exit_code;
    }
    exit $exit_code;
  }
    elsif ( $command eq "start" ) {

        # all arguments are passed.
        # You can also grant write access (create user, set read_only=0, etc) here.
        my $exit_code = 10;
        eval {
            print "Enabling the VIP - $vip on the new master - $new_master_host \n";
            &start_vip();
            &stop_vip();
            $exit_code = 0;
        };
        if ($@) {
            warn $@;
            exit $exit_code;
        }
        exit $exit_code;
    }
    elsif ( $command eq "status" ) {
        print "Checking the Status of the script.. OK \n";
        `ssh $ssh_user\@$orig_master_host \" $ssh_start_vip \"`;
        exit 0;
    }
    else {
        &usage();
        exit 1;
    }
}


sub start_vip() {
    `ssh $ssh_user\@$new_master_host \" $ssh_start_vip \"`;
}
# A simple system call that disable the VIP on the old_master
sub stop_vip() {
   `ssh $ssh_user\@$orig_master_host \" $ssh_stop_vip \"`;
}


sub usage {
  print
"Usage: master_ip_failover --command=start|stop|stopssh|status --orig_master_host=host --orig_master_ip=ip --orig_master_port=port --new_master_host=host --new_master_ip=ip --new_master_port=port\n";
}
6、部署master服务器
# 安装mysql5.7
[root@centos79-mysql01 ~]# vim /etc/my.cnf
[mysqld]
server-id=1
log-bin
skip_name_resolve=1
general_log

[root@centos79-mysql01 ~]# service mysqld restart

[root@centos79-mysql01 ~]# mysql -uroot -p123456


mysql> show master logs;
+-----------------------------+-----------+
| Log_name                    | File_size |
+-----------------------------+-----------+
| centos79-mysql01-bin.000001 |       177 |
| centos79-mysql01-bin.000002 |       437 |
| centos79-mysql01-bin.000003 |       154 |
+-----------------------------+-----------+
3 rows in set (0.00 sec)

# 新建用户并授权
mysql> grant replication slave on *.* to copyuser@'192.168.%' identified by '123456';
mysql> grant all on *.* to mhauser@'192.168.%' identified by '123456';

[root@centos79-mysql01 ~]#
ifconfig eth0:1 192.168.1.20/24
7、部署slave服务器
# slave1安装mysql5.7
[root@centos79-mysql02 ~]# vim /etc/my.cnf
[mysqld]
server-id=2
log-bin
read_only
relay_log_purge=0
skip_name_resolve=1
general_log

[root@centos79-mysql02 ~]# service mysqld restart

[root@centos79-mysql02 ~]# mysql -uroot -p123456

mysql> CHANGE MASTER TO MASTER_HOST='192.168.1.21', MASTER_USER='copyuser', MASTER_PASSWORD='123456', MASTER_LOG_FILE='centos79-mysql01-bin.000003', MASTER_LOG_POS=154;

mysql> start slave;

mysql> show slave status\G
*************************** 1. row ***************************
               Slave_IO_State: Waiting for master to send event
                  Master_Host: 192.168.1.21
                  Master_User: copyuser
                  Master_Port: 3306
                Connect_Retry: 60
              Master_Log_File: centos79-mysql01-bin.000003
          Read_Master_Log_Pos: 740
               Relay_Log_File: centos79-mysql02-relay-bin.000002
                Relay_Log_Pos: 917
        Relay_Master_Log_File: centos79-mysql01-bin.000003
             Slave_IO_Running: Yes
            Slave_SQL_Running: Yes

# slave2安装mysql5.7
[root@centos79-mysql03 ~]# vim /etc/my.cnf
[mysqld]
server-id=3
log-bin
read_only
relay_log_purge=0
skip_name_resolve=1
general_log

[root@centos79-mysql03 ~]# service mysqld restart

[root@centos79-mysql03 ~]# mysql -uroot -p123456

mysql> CHANGE MASTER TO MASTER_HOST='192.168.1.21', MASTER_USER='copyuser', MASTER_PASSWORD='123456', MASTER_LOG_FILE='centos79-mysql01-bin.000003', MASTER_LOG_POS=154;

mysql> start slave;

mysql> show slave status\G
*************************** 1. row ***************************
               Slave_IO_State: Waiting for master to send event
                  Master_Host: 192.168.1.21
                  Master_User: copyuser
                  Master_Port: 3306
                Connect_Retry: 60
              Master_Log_File: centos79-mysql01-bin.000003
          Read_Master_Log_Pos: 740
               Relay_Log_File: centos79-mysql03-relay-bin.000002
                Relay_Log_Pos: 917
        Relay_Master_Log_File: centos79-mysql01-bin.000003
             Slave_IO_Running: Yes
            Slave_SQL_Running: Yes
8、检查MHA的环境
[root@mha ~]# masterha_check_ssh --conf=/etc/mastermha/app1.cnf
Mon Nov 21 15:07:50 2022 - [info] All SSH connection tests passed successfully.

[root@mha ~]# masterha_check_repl --conf=/etc/mastermha/app1.cnf
MySQL Replication Health is OK.

[root@mha ~]# masterha_check_status --conf=/etc/mastermha/app1.cnf
app1 is stopped(2:NOT_RUNNING).
9、启动MHA
[root@mha ~]# nohup masterha_manager --conf=/etc/mastermha/app1.cnf --remove_dead_master_conf --ignore_last_failover &> /data/mastermha/app1/nohup.log&

[root@mha ~]# masterha_check_status --conf=/etc/mastermha/app1.cnf
app1 (pid:31564) is running(0:PING_OK), master:192.168.1.21


# 停止
masterha_stop --conf=/etc/mastermha/app1.cnf

# 查看到健康性检查
[root@centos79-mysql01 ~]# tail -f /data/mysql/centos79-mysql01.log
2022-11-21T07:28:11.046105Z	   48 Query	SELECT 1 As Value
2022-11-21T07:28:12.046561Z	   48 Query	SELECT 1 As Value
2022-11-21T07:28:13.049866Z	   48 Query	SELECT 1 As Value
10、排错日志
tail /data/mastermha/app1/manager.log
11、模拟故障
[root@centos79-mysql01 ~]# service mysqld stop
# 验证VIP漂移至新的Master上
[root@centos79-mysql02 ~]# ifconfig
eth0: flags=4163<UP,BROADCAST,RUNNING,MULTICAST> mtu 1500
inet 192.168.1.22 netmask 255.255.255.0 broadcast 192.168.1.255
inet6 fe80::20c:29ff:fe47:3341 prefixlen 64 scopeid 0x20<link>
ether 00:0c:29:47:33:41 txqueuelen 1000 (Ethernet)
RX packets 504176 bytes 706923832 (674.1 MiB)
RX errors 0 dropped 0 overruns 0 frame 0
TX packets 36625 bytes 4764218 (4.5 MiB)
TX errors 0 dropped 0 overruns 0 carrier 0 collisions 0
eth0:1: flags=4163<UP,BROADCAST,RUNNING,MULTICAST> mtu 1500
inet 192.168.1.20 netmask 255.255.255.0 broadcast 192.168.1.255
ether 00:0c:29:47:33:41 txqueuelen 1000 (Ethernet)
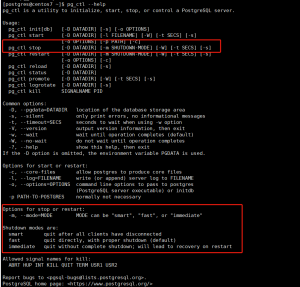
# 自动修改manager节点上的配置文件,将master剔除
![图片[2]-部署MHA实现Mysql高可用-李佳程的个人主页](http://www.lijiach.com/wp-content/uploads/2022/11/image-141.png)
# 如果出错,需要删除下面文件再执行MHA
rm -f /data/mastermha/app1/app1.failover.error
12、主服务器故障修复
- 修复故障的主库,保证数据同步
- 修复主从,手工将故障库加入主从,设为从库
- 修复manager的配置文件
- 清理相关目录
- 检查ssh互信和replication的复制是否成功
- 检查VIP,如果有问题,重新配置VIP
- 重新运行MHA,查询MHA状态,确保运行正常
13、如果再次运行MHA
# MHA只能漂移一次,如果多次使用必须删除以下文件,要不MHA不可重新启用
rm -rf /data/mastermha/app1/                #mha_master自己的工作路径
rm -rf /data/mastermha/app1/manager.log     #mha_master自己的日志文件
rm -rf /data/mastermha/app1/                #每个远程主机即三个节点的工作目录
© 版权声明
文章版权归作者所有,未经允许请勿转载。
THE END